
Since our post on Installing bottom brackets like a boss, it only seems fair that we write up instruction on how to safely remove a pressed in bottom bracket.
The main goal is to remove the bottom bracket with minimal amount of damage to the cups, while making sure we do not destroy the bearings by hammering away on the seals or inner race.
All Kogel Bearings cups are designed with a lip on the inside that is meant to take a punch and protect the bearings. Depending on the design restrictions of each setup, this lip is more or less prominent.
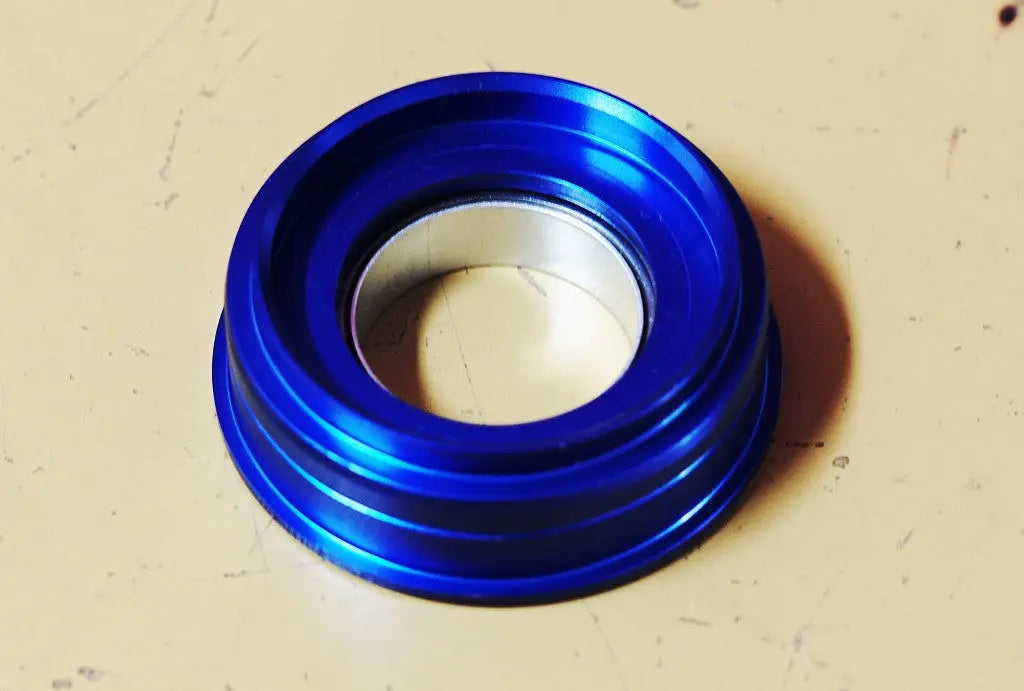
- Every Kogel Bottom bracket has a lip on the inside that covers the bearings while you take a hammer to the cup. It adds a bit of weight, but at least you're not buying a new bottom bracket every time you need to look inside the frame.
Before we get started, I want you to be completely honest with yourself: the removal of a bottom bracket requires specific tools and a healthy dose of Mechanic Hands: having the feeling in your fingertips. Just like installing bottom brackets, it is something that develops over time when you have done the same operation a hundred times. Do you feel comfortable taking a hammer to your beloved Colnago, or do you prefer to pay a professional 20 or 30 bucks to do it for you? The choice is yours, I won't judge you either way.
Tools required for bottom bracket removal
metal hammer
flared punch: Park tool BBT-90.3 and RT-1
Enduro BRT-002 and BRT-003 (for bearing service)
The key item to a successful removal are the flared bottom bracket and headset removers made by Park Tool. In theory any punch will get the job done, but I like how these tools are able to spread the impact over four sides of the cup and press it out in a straight line, rather than the left-right-left-right wiggling of a standard punch.
These punches work like a dream: stick the pointy end into the side you are looking to remove, slide it through until you hear the arms pop open inside the cup and you're good to go.
I recommend a metal hammer over a rubber mallet because we need to get the bottom bracket out with the least amount of blows to avoid hitting and damaging the bearings. The impact of metal on metal will shock the cup and make it jump.
How to set yourself up for success
Depending on the design limitation we face in frames, the contact area, or insert depth, of your cup can be anywhere between 9mm and almost an inch. The deeper the insert, the more stable the setup, but also the harder it will be to remove the cups.
The best way to stabilize the bottom bracket for removal is on a work stand that supports the bottom bracket area, like the Feedback Sports Sprint Work Stand. A work stand that holds the seat post, or simply placing the bike on the floor will cause some flex from the frame or the wheels. It's fine for cups that come out easily.
Hammer like you mean it
Like I said: we want the bottom bracket to come out with the smallest number of impacts to limit damage to the cups and in the end the bearings. Once you have committed to this removal, use a hammer with some weight to it and act like you mean business.
If a bottom bracket is particularly hard to remove, it is best to make this a two person job: one operates the hammer and the punch. The other stands on the opposite side of the bike, holding the down tube and chain stay to counter the impacts.
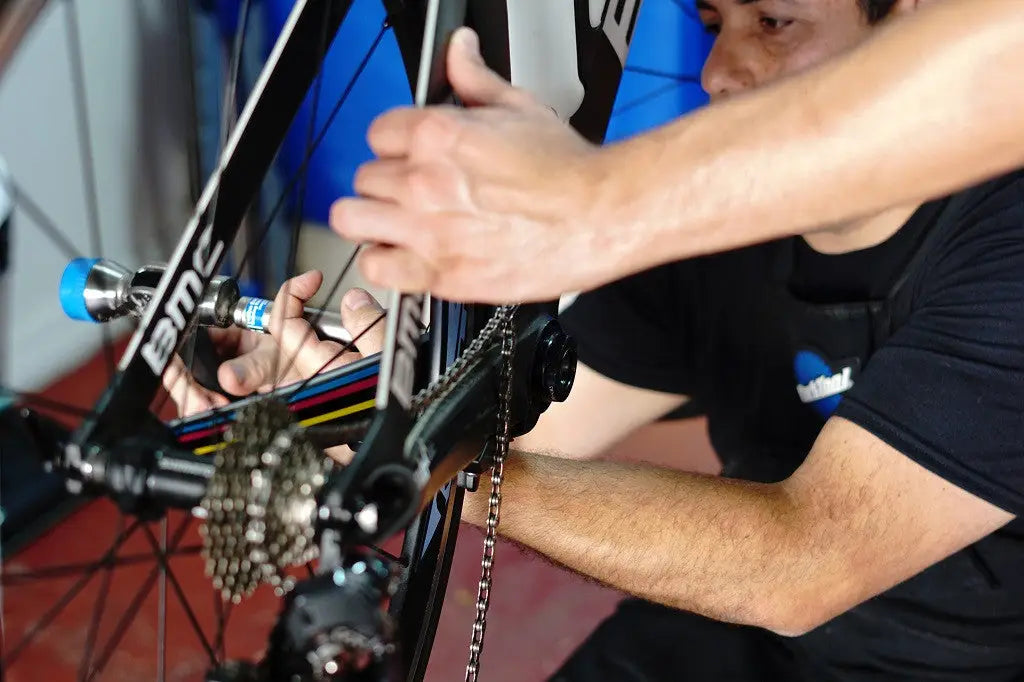
- Sometimes it is a 2-person job. Get a friend in there to stabilize the frame while you remove the bottom bracket.
Should you damage the cups or bearings in the removal: we keep spare parts of our entire collection in our warehouse to make sure you're not in the hole for a complete new set. Reach out via email or the 'need help?' button at the bottom of our web page
Leave the cups, remove the bearings for service
When it comes to annual bearing service, it might be smart to remove the bearings while leaving the cups in the frame. Make sure to use a tool that threads the bearings out. Any tool that uses a sliding hammer is a surefire way to destroy the races.
On my personal bikes, I often service the bearings while they are still installed. This eliminates the option of replacing the inboard seals, but unless you get a ton of contamination through the inside of your bottom bracket, you should be OK. A spray can of Clean Streak is your friend for this operation.
I hope this helps. As always: if you have any questions, we are here to answer. Use the contact button or email info@kogel.cc.